How Can I Convert Notepad Data to Excel?
There are times when we have a .txt file with a large amount of data and need to structure it in the form of a table. For example, many engineering devices made in the 1990s frequently used .txt files for data output. Copying text directly from Notepad and pasting it into Excel does not convert it into a structured table format.
To convert Notepad data to Excel, you can follow one of these four methods: using Excel's Text Import Wizard, using the Get & Transform Data feature in Excel, using the Text to Columns feature in Excel, or using Visual Basic for Applications (VBA) in Excel.
Method 1 (Using Excel's Text Import Wizard)
To convert a Notepad document to Excel file in Windows 10 and 11 using Microsoft Excel, follow these steps:
- Step 1: Open Microsoft Excel.
- Step 2: Click on the "File" section in Excel.
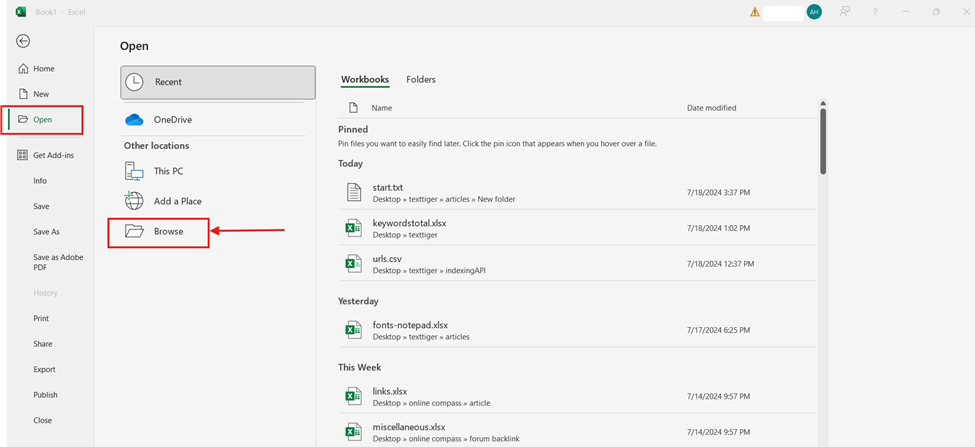
- Step 3: In the opened window, click on the Browse, select ' All Files (*.*)' from the drop-down menu in the lower right corner, choose your Notepad file, and click on 'Open'.
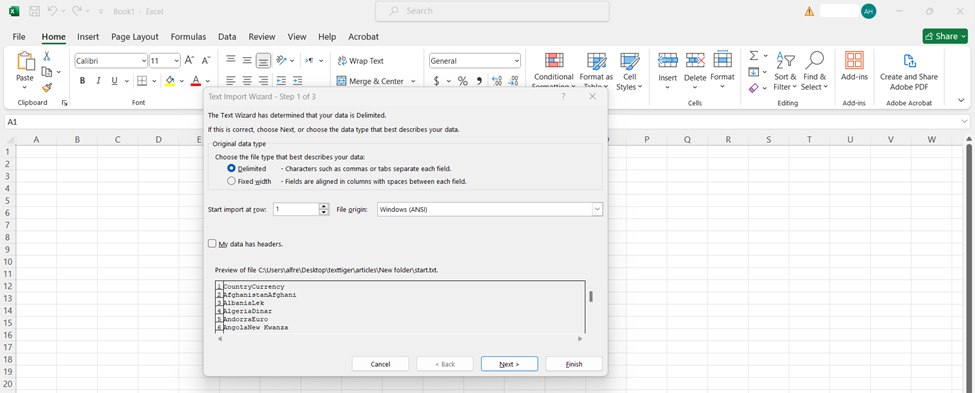
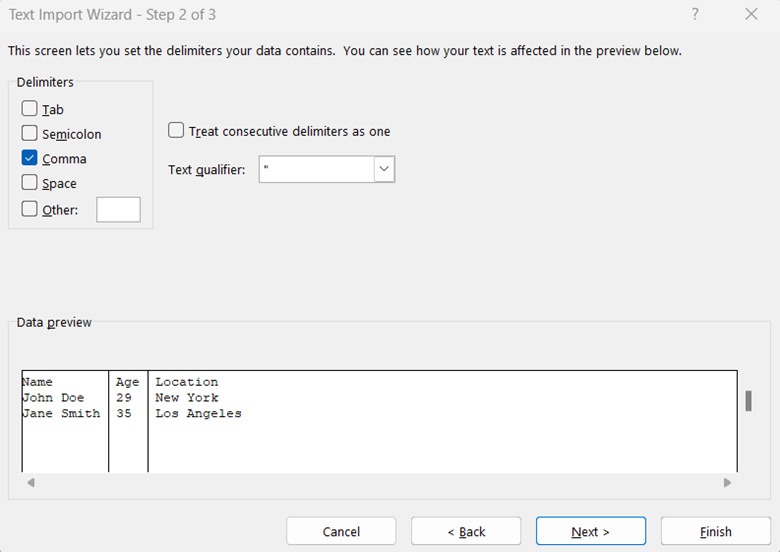
- Step 4: The Text Import Wizard page will be displayed. Choose the file type that suits your Notepad file between Delimited and Fixed width.
- Delimited text: Use when your data is separated by commas or tabs or semicolon.
- Fixed width: Use when your data is arranged in columns with spaces between each field.
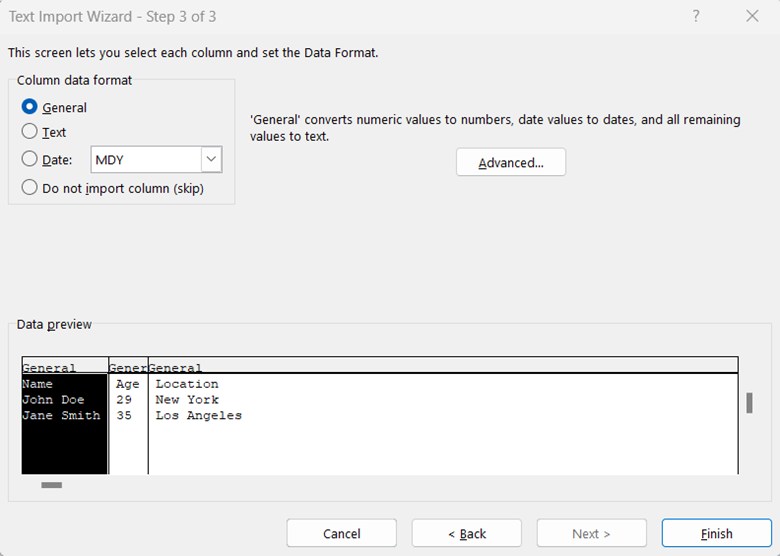
- Step 5: Click on “Next”. If you have chosen the delimited file type, when you click on “Next”, you should set the delimiters that your data contains, whether it's Tab, semicolon, comma, space, or any other character.
- Step 6: Click on “Finish”.
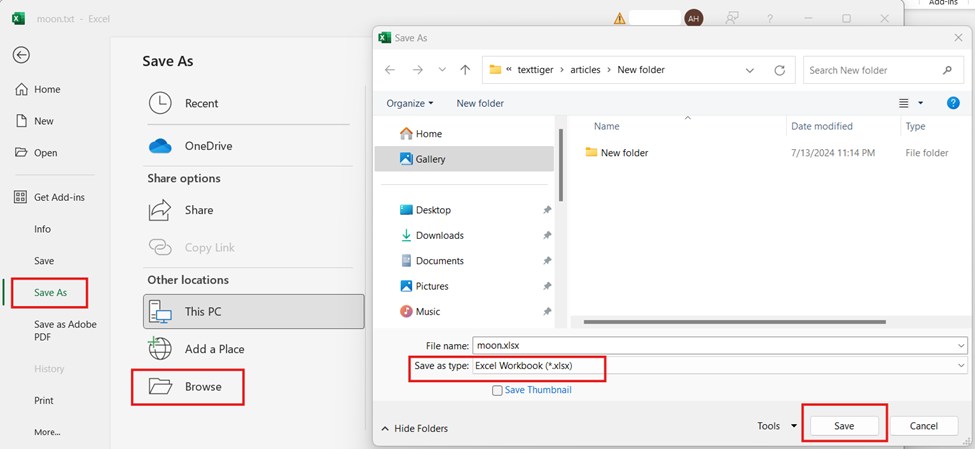
- Step 7: From the "File" section, go to "Save As". Choose the directory where you want to save your file.
- Step 8: Select Excel Workbook (*.xlsx) as the file type and click on the Save button.
In Excel's Text Wizard, you can use:

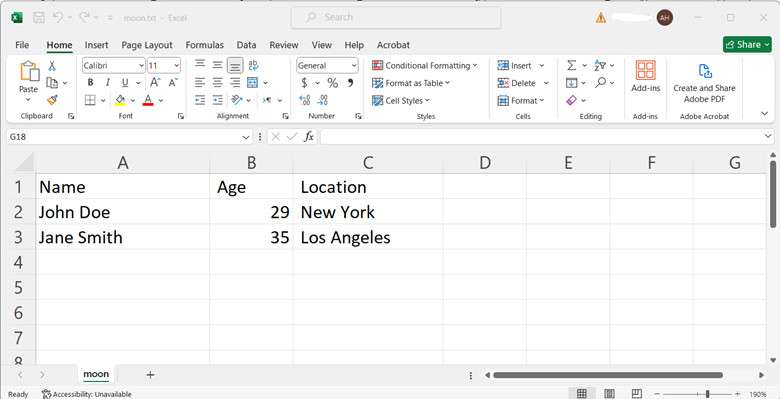
Now you will see that your Notepad text has been imported into Excel in a table-structured form.
How can I convert Notepad to .csv format?
To convert Notepad to .csv format, follow all the steps above. The only difference is in Step 8, where you must choose CSV UTF-8 (*.csv) as the file type and click on the Save button.
Method 2 (Using the Get & Transform Data Feature in Excel):
- Step 1: Open Excel and go to the Data
- Step 2: In the Get & Transform Data section, click the From Text/CSV
- Step 3: Navigate to the location of the file you want to import, select the file, and click the Import
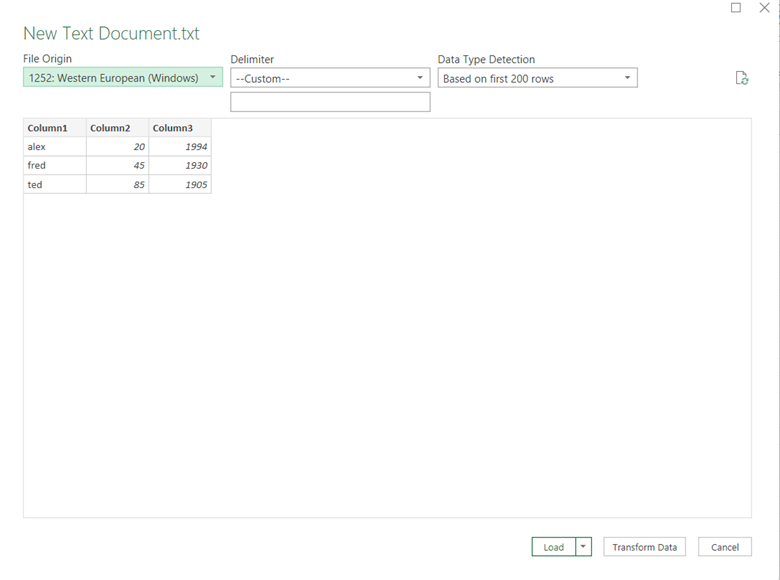
- Step 4: A pop-up window will appear in Excel, displaying a preview of your imported file. Select the delimiter and file origin, then click Load.
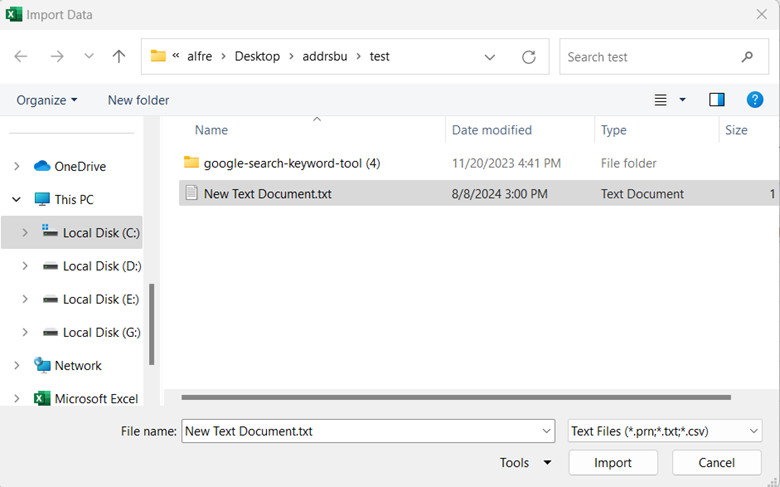
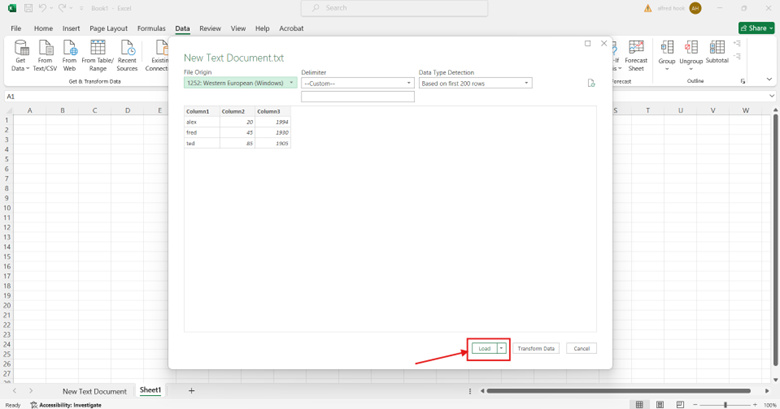
Note: In the Delimiter section, you can specify the delimiter you want, including a colon, comma, equals sign, semicolon, space, tab, fixed width, or custom. Additionally, you can specify the character encoding of your imported file in the File Origin section.
The Get & Transform Data section was introduced in Excel 2010 and 2013 as an add-in called Power Query. Therefore, if you are using Excel 2010 or 2013, you need to download and install the add-in to use it in Excel. Starting with Excel 2016, the Get & Transform Data section has been integrated into the Data tab.
Method 3 (Using the Text to Columns Feature in Excel)
To use the text to columns feature in Excel, the text in the Notepad file must have a defined structure, such as data separated by commas, spaces, or a specific fixed character. If your Notepad text meets this criterion, follow the steps below:
- Step1: Copy the text from Notepad and paste it into an Excel cell.
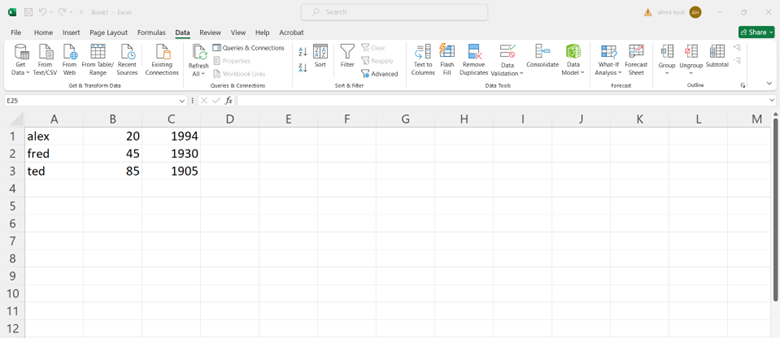
- Step 2: From the Data tab in Excel, click on the Text to Columns
- Step 3: In the Text to Columns Wizard page, select Delimited and choose your delimiter type (e.g., comma, tab). Then, click Next.
- Step 4: Click the Finish button to display the data in a structured format in Excel.
Method 4 (Visual Basic for Applications (VBA)):
By using VBA, you can specify the text file path, modify it using VBA code, and then structure it for display in Excel. To do this:
- Step 1: First, click on the Visual Basic option from the Developer tab in Excel.
- Step 2: In the Visual Basic environment, click on the Insert tab and select Module from the menu.
- Step 3: In the Modules section of the left menu, a module named Module1 will be created. Right-click on it, select View Code, and enter your VBA code.
- Step 4: Finally, click on the Run Sub/UserForm option from the Run tab to execute the VBA code and display the structured text file in Excel.
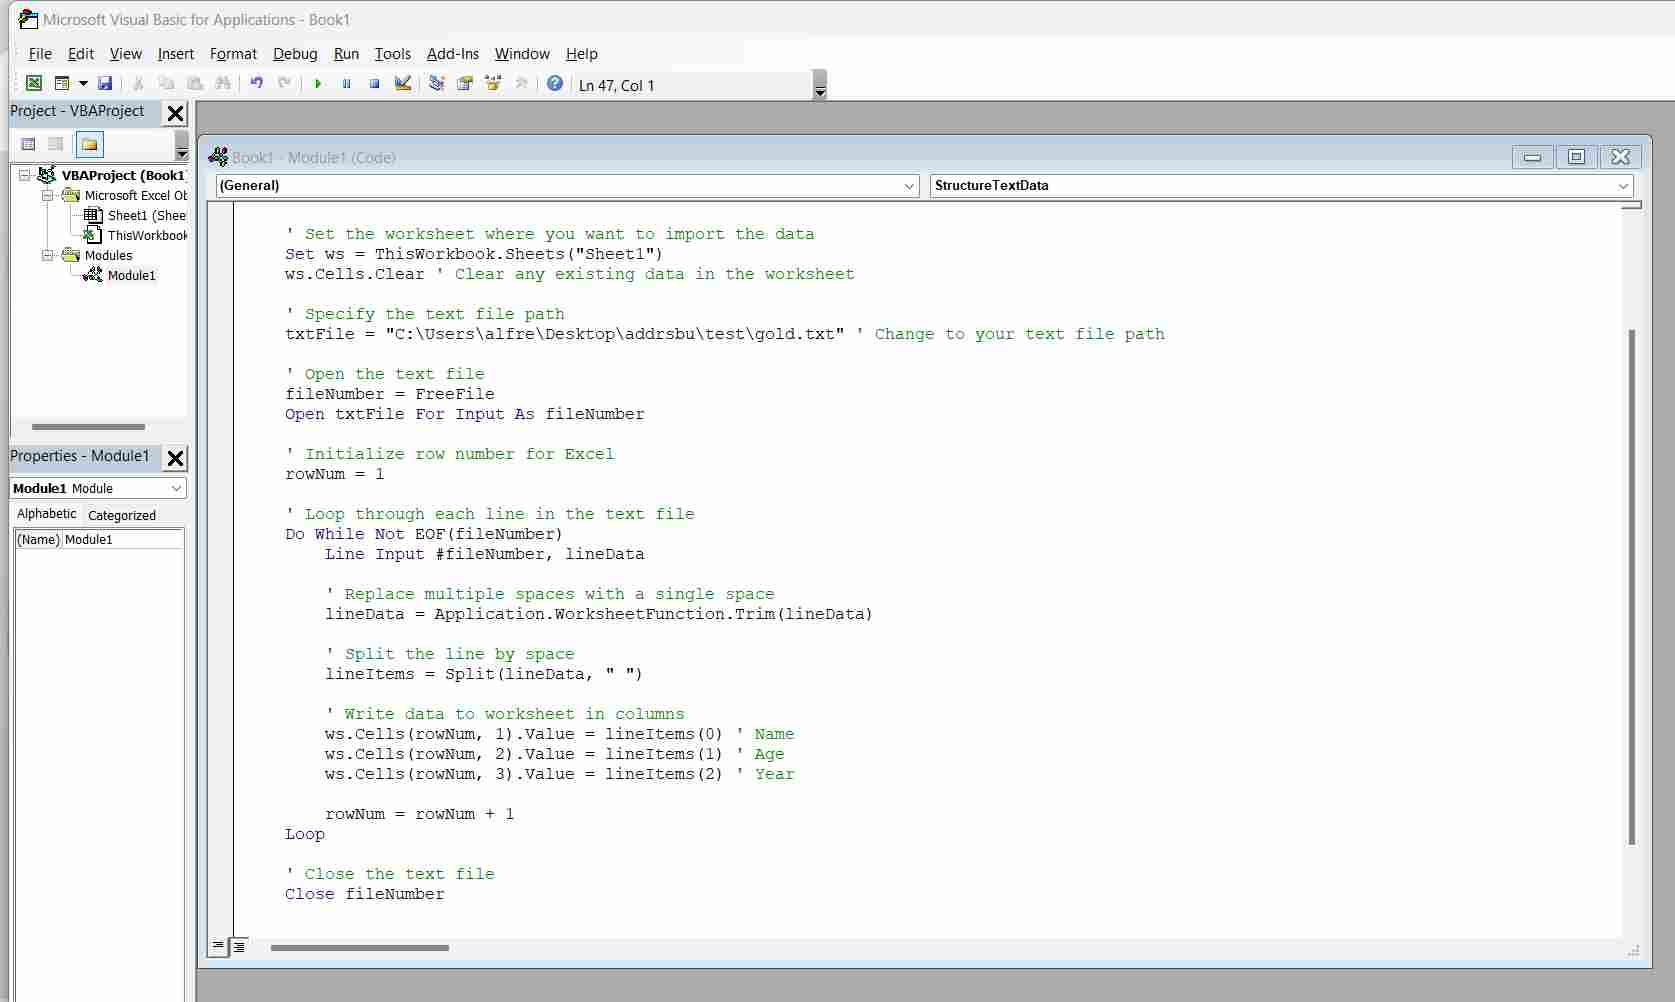
For example, the following code can be used to convert .txt files with space-separated data:
Sub StructureTextData()
Dim ws As Worksheet
Dim txtFile As String
Dim rowNum As Long
Dim lineData As String
Dim lineItems() As String
Dim fileNumber As Integer

' Set the worksheet where you want to import the data
Set ws = ThisWorkbook.Sheets("Sheet1")
ws.Cells.Clear ' Clear any existing data in the worksheet

' Specify the text file path
txtFile = "C:\Users\%USERNAME%\Desktop\path\to\your\file.txt" ' Change to your text file path

' Open the text file
fileNumber = FreeFile
Open txtFile For Input As fileNumber

' Initialize row number for Excel
rowNum = 1

' Loop through each line in the text file
Do While Not EOF(fileNumber)
    Line Input #fileNumber, lineData

    ' Replace multiple spaces with a single space
    lineData = Application.WorksheetFunction.Trim(lineData)

    ' Split the line by space
    lineItems = Split(lineData, " ")

    ' Write data to worksheet in columns
    ws.Cells(rowNum, 1).Value = lineItems(0) ' Name
    ws.Cells(rowNum, 2).Value = lineItems(1) ' Age
    ws.Cells(rowNum, 3).Value = lineItems(2) ' Year

    rowNum = rowNum + 1
Loop

' Close the text file
Close fileNumber

MsgBox "Text data structured successfully!"
End Sub
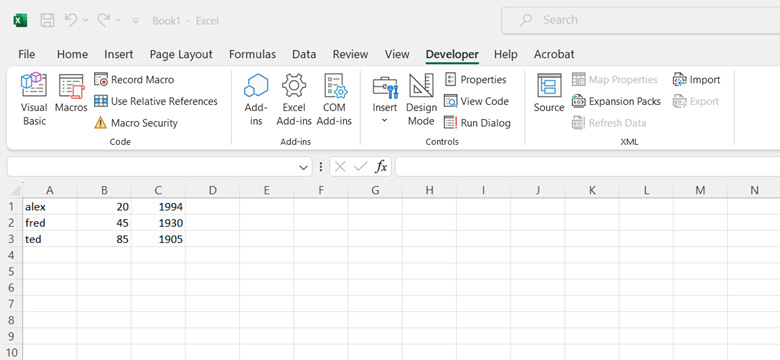
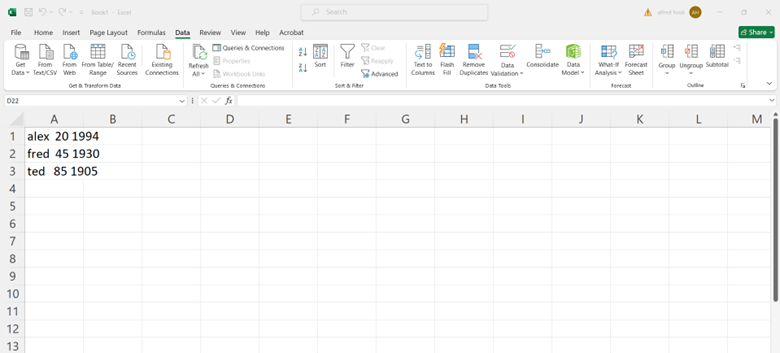
The output will be structured as follows:
