
How to Print a Notepad Document?

You can print from Notepad on Windows 10 and 11 using the following three methods:
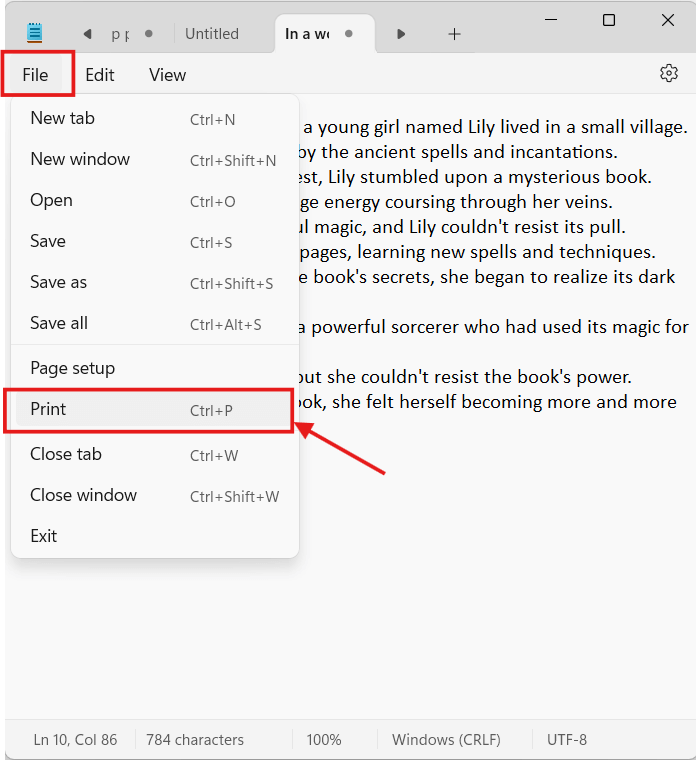
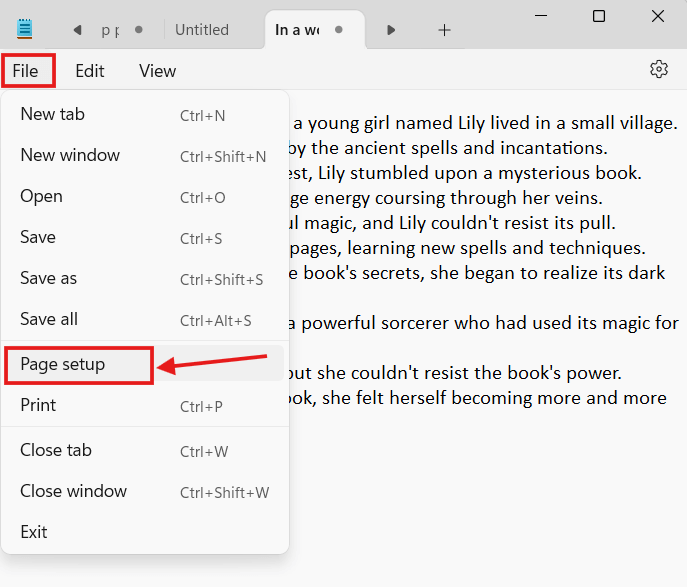
Method 1 (Print via Menu Bar)
- Step 1: Open your Notepad file.
- Step 2: Select "File" from the menu bar.
- Step 3: Click "Print" from the drop-down menu.
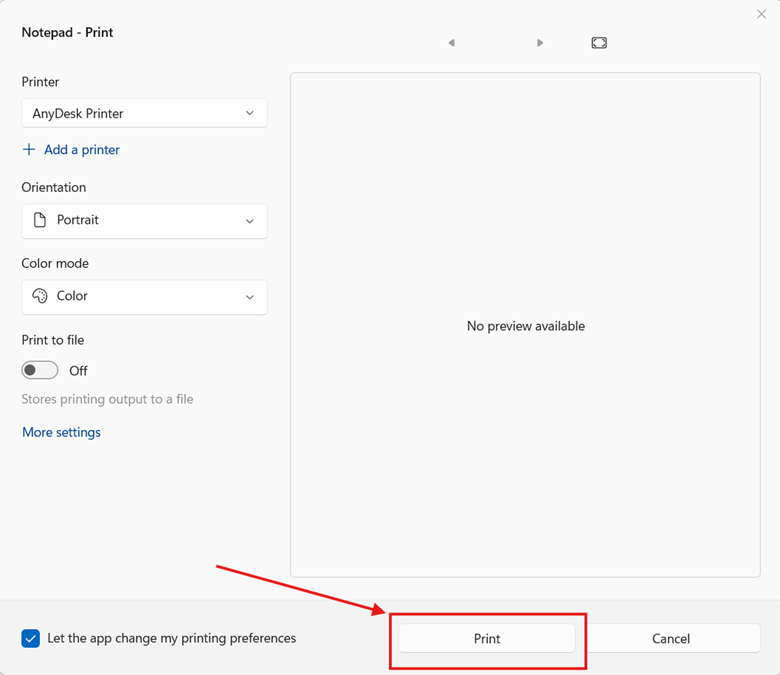
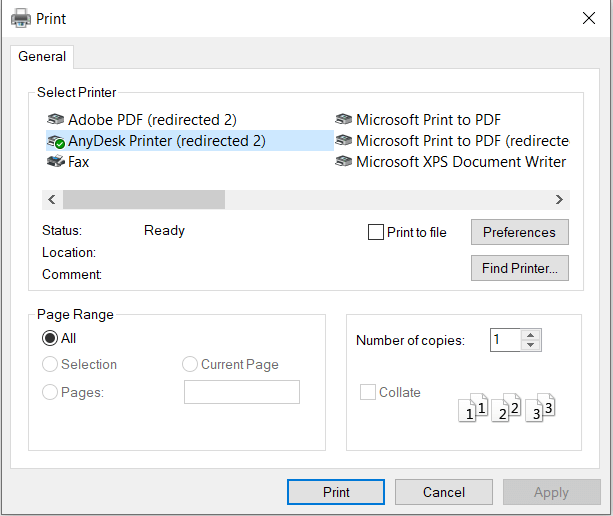
- Step 4: In the window that opens, set your preferred printer settings and click the"Print" button.
Method 2 (Print via Ctrl + P shortcut)
- Step 1: Open your Notepad file.
- Step 2: To print in Windows 11 Notepad, use the Ctrl + P shortcut.
- Step 3: In the window that opens, set your preferred printer settings and click "Print".
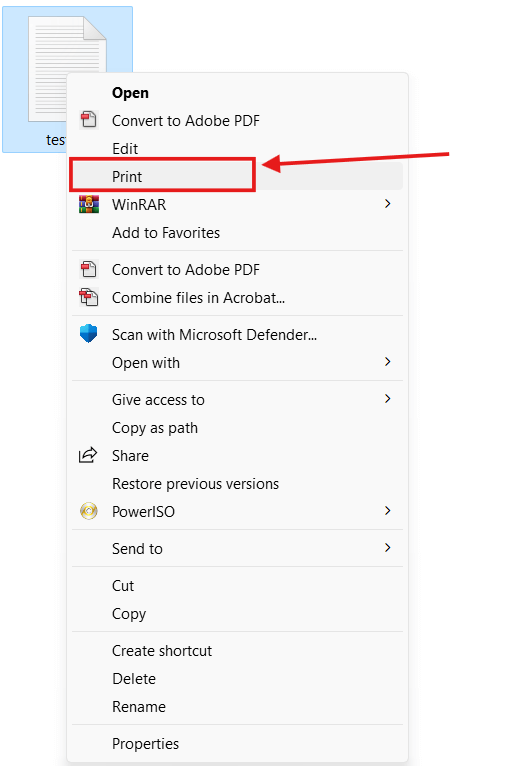
Method 3 (Print via Right-click on the file)
- Step 1: Right-click on the file without opening it.
- Step 2: Select "Print" from the context menu.
- Step 3: In the window that opens, set your preferred printer settings and click "Print".
How to change the page size for printing from Notepad?
- Step 1: Open Notepad on Windows 10/11 and go to File > Page Setup.
- Step 2: In the Page Setup dialog box, select the desired paper size from the 'Size' dropdown menu.
- A4
- A3
- B4 (JIS)
- B5 (JIS)
- Envelope #10
- Envelope Monarch
- Executive
- Legal
- Letter
- Tabloid
- Step 3: Click 'OK' to save your changes.

Notepad in Windows 11 offers 10 predefined paper sizes:
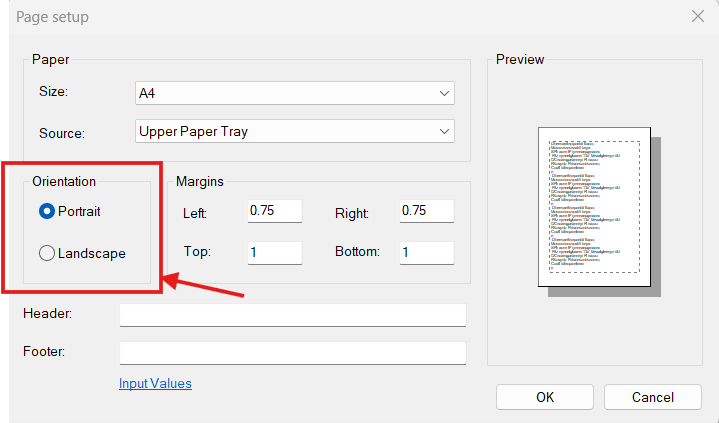
How to change the page orientation for printing from Notepad?
- Step 1: Open Notepad on Windows 10/11 and go to File > Page Setup.
- Step 2: In the Page Setup dialog box, select the desired orientation: Portrait (vertically) or Landscape (horizontally). Portrait is the default.
- Step 3: Click 'OK' to save your changes.
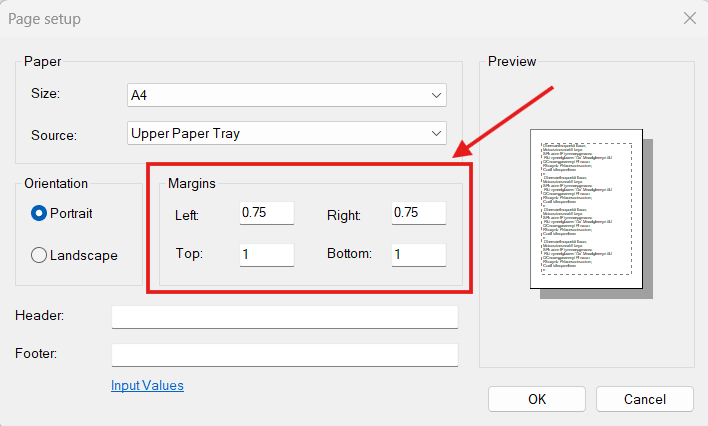
How to change the page margins for printing from Notepad?
- Step 1: Open Notepad on Windows 10/11 and go to File > Page Setup.
- Step 2: In the Page Setup dialog box, click on the "Margins" section.
- Step 3: Adjust the margin settings as desired: Top margin, Bottom margin, Left margin and Right margin
- Step 4: Click 'OK' to save your changes.
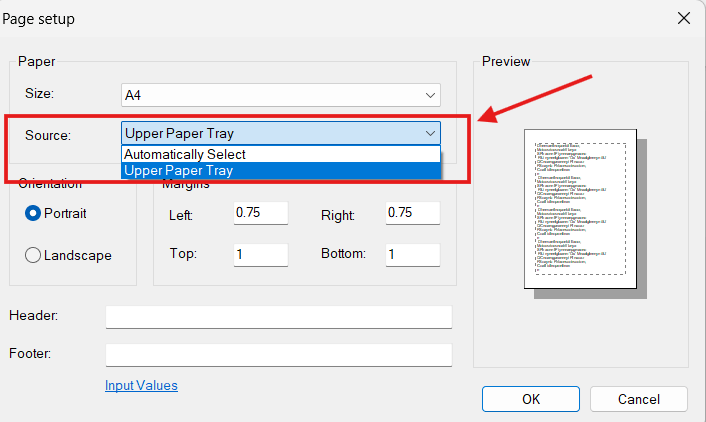
How to change the page source for printing from Notepad?
- Step 1: Open Notepad on Windows 10/11 and go to File > Page Setup.
- Step 2: From the Source section, select either 'Automatically select' or 'Upper Paper Tray'.
- Step 3: Click 'OK' to save your changes.
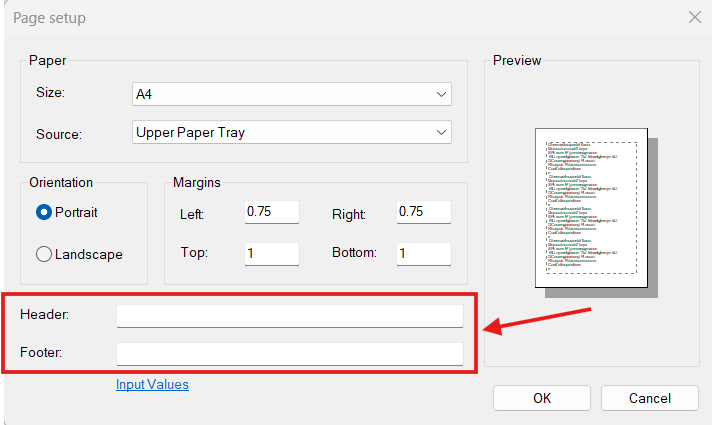
How to change the header and footer for printing from Notepad?
- Step 1: Open Notepad on Windows 10/11 and go to File > Page Setup.
- Step 2: Enter the text or codes for your desired header and footer content in the fields labeled "Header" and "Footer".
- Step 3: Click 'OK' to save your changes.
Note: You can also use the following commands in Windows 10 and Windows 11 to insert specific information in your header and footer:
|
Command |
Action |
|
&l |
Left-align the characters that follow. |
|
&c |
Center the characters that follow. |
|
&r |
Right-align the characters that follow. |
|
&d |
Print the current date. |
|
&t |
Print the current time. |
|
&f |
Print the name of the document. |
|
&p |
Print the page number. |
For example:
- to insert the page number and file name in the footer, enter: "&w &f"
- &c My Custom Header (This will center the text "My Custom Header" in the header)
Note: There's a tricky point to keep in mind. According to Microsoft's documentation for
Notepad on Windows 10 and 11, this has been stated:
In Notepad, if the formatting
code is not the first item in the Header text box, your header is centered regardless of the formatting
codes you use. For example, to align a title to the left side of the page, use &lTitle
text.
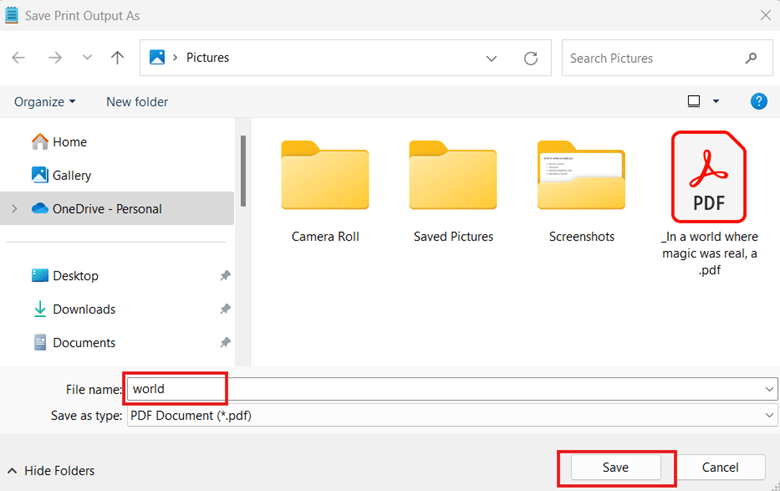
Can I see a print preview of my document before printing using Notepad?
No, you cannot preview your document before printing using Notepad on Windows 10/11. Notepad is a basic text editor and lacks a built-in print preview feature. However, there's an indirect way to see how your printed file will look like:
- Step 1: In Notepad, press Ctrl + P
- Step 2: In the Printer section, select "Microsoft Print to PDF".
- Step 3: Click the "Print" button.

- Step 4: In the window that opens, choose a file destination, enter a file name, and select "Save"
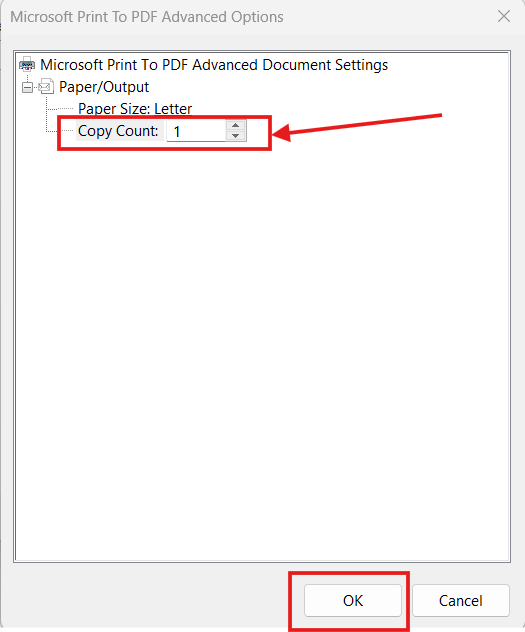
Can I print multiple copies of a document from Notepad?
Print multiple copies of a document from Notepad on Windows 11:
- Step 1: Open your document in Notepad on Windows 11.
- Step 2: Go to File > Print (or press Ctrl+P)
- Step 3: On the opened page, click on "More settings".
- Step 4: Click on "Advanced..." at the bottom right corner of the page.
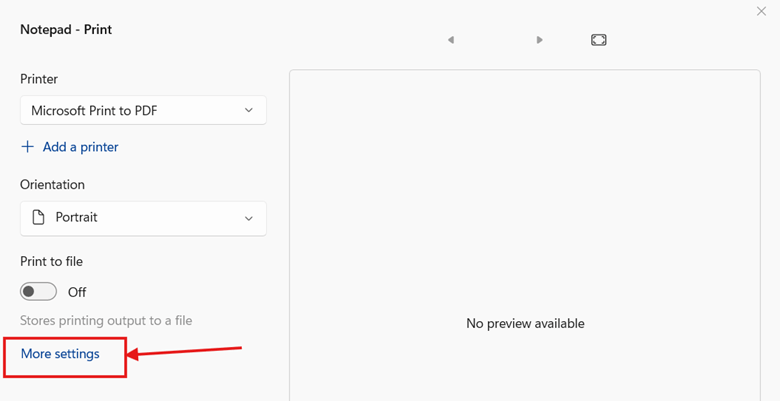
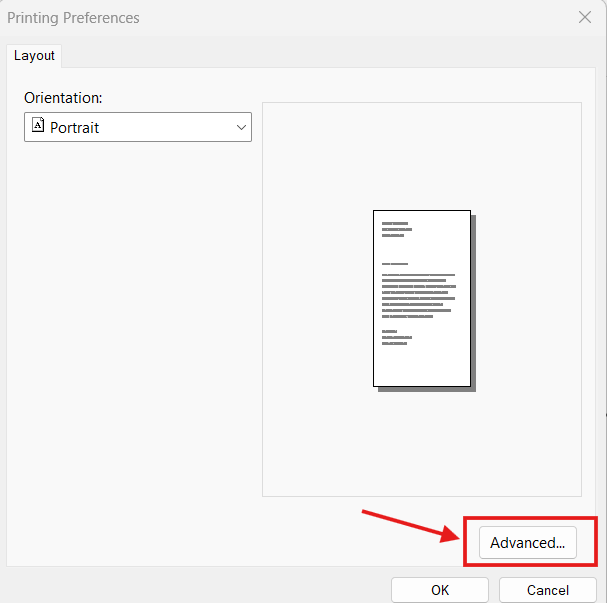
- Step 5: Enter the number of copies you want to print in the "Copy Count" field and click "OK".
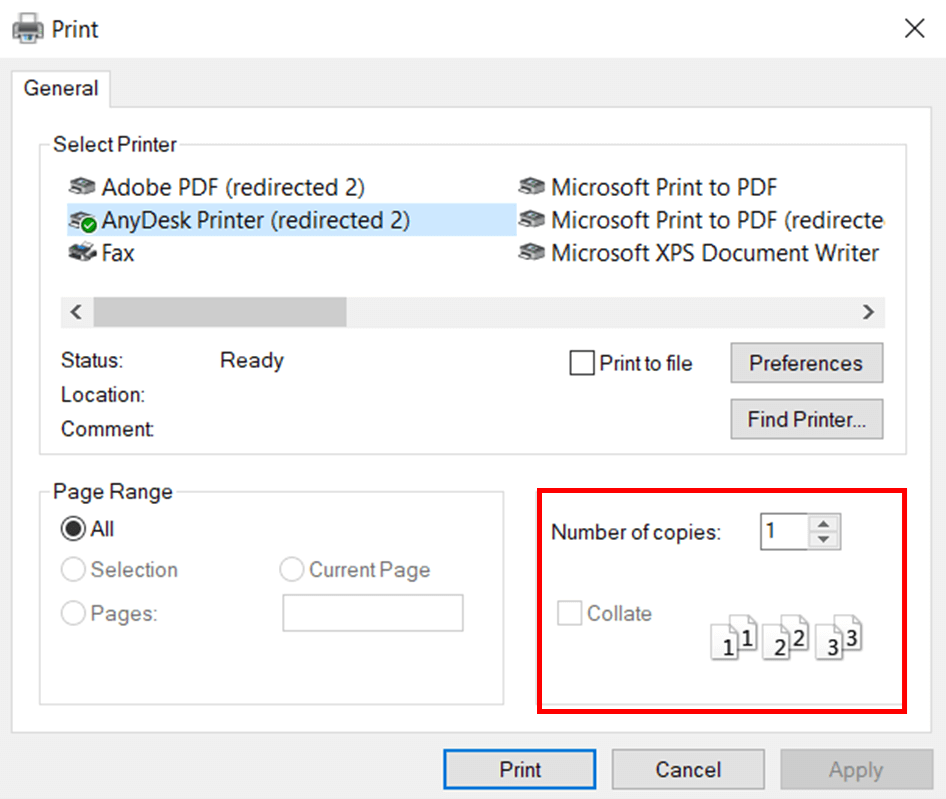
Print multiple copies of a document from Notepad on Windows 10:
To print multiple copies of a document from Notepad on Windows 10, follow these steps:
- Step 1: Open your document in Notepad on Windows 10.
- Step 2: Go to File > Print (or press Ctrl+P)
- Step 3: Enter the number of copies you want to print in the "Number of copies" field and click "Print".
How to print notepad file on one page?
If you want to print your Notepad file on a single page, but it's currently printing on multiple pages, you'll need to adjust some settings:
- Step 1:
Go to the File menu and select Page Setup. In the window that opens, select the correct paper size (e.g., A4). If you don't mind printing your file in landscape orientation on a single page, choose Landscape. You can also reduce the margins (left, right, top, and bottom) to increase the text area. - Step 2:
If you've followed all the guides in Step 1 and your file still doesn't fit on one page, you can reduce the font size. On Windows 11, click the settings gear and decrease the font size in the Text Formatting section.